Recipe: Christmas Tree Chocolate Brownies
- Body Content
-
It’s true to say that not everyone loves a mince pie, but there are very few people who would turn down a gooey-centred chocolate brownie. Dress it up as a Christmas tree and you are onto a winner!
Brownies are a joy to make compared to most cakes, there’s no vigorous whipping or fancy gadgets required, but that’s mainly because they are just butter, sugar and chocolate, melted and stirred together.
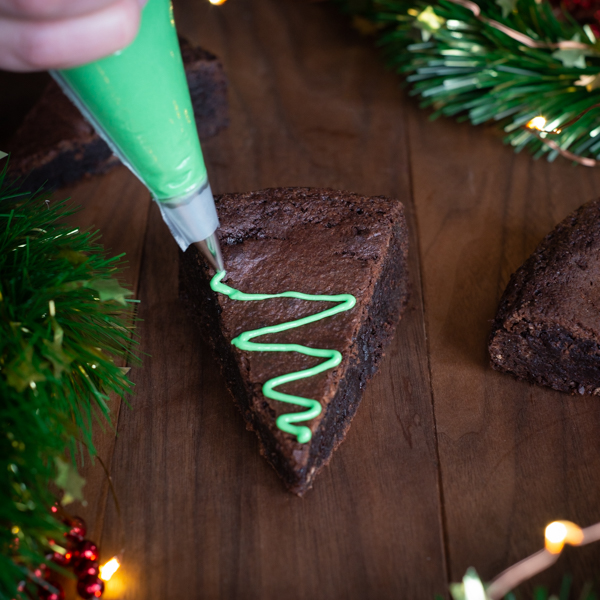
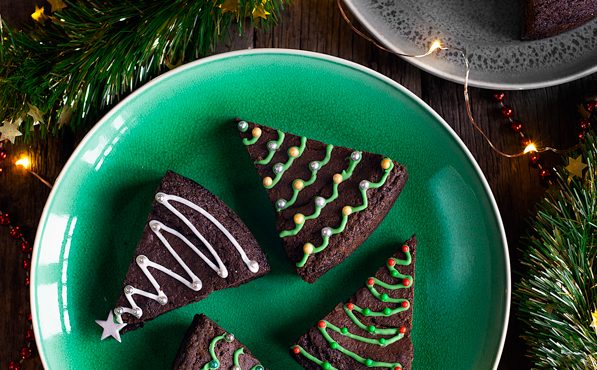
What’s not to love? If you make them in a round cake tin instead of a square brownie pan they are only seconds away from becoming festive trees with a drizzle of icing and a few shiny silver balls. You can even add extra chocolate tree trunk if you feel the need.
These brownies make a wonderful gift, but do make yourself an extra batch for secret snacks or warmed up with cream and raspberries as pudding. These cute brownies keep well in a tin in a cool place for up to 5 days.
Ingredients
150g dark chocolate (chopped) or use half milk, half plain chocolate if preferred
190g butter (cubed)
50g cocoa
50g plain flour
1/2 tsp baking powder
270g caster sugar
3 large eggs
50g chocolate chipsFor Decoration
Icing sugar or royal icing sugar
Food colouring
Silver balls and starsMethod
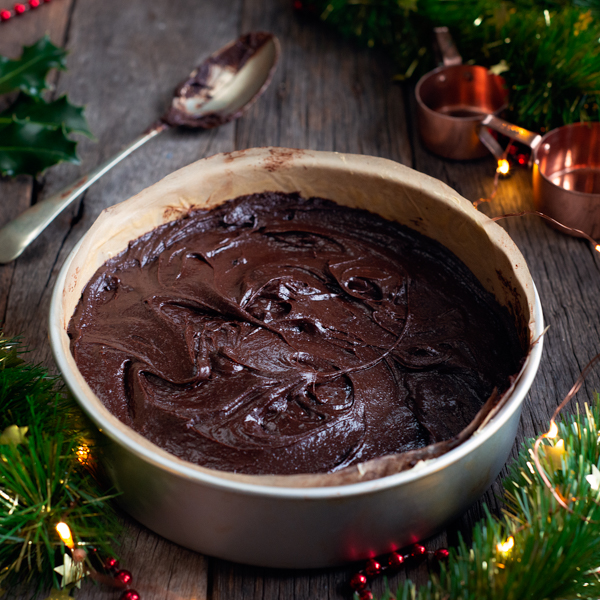
- Grease and line an 8” or 9” loose-bottomed tin and preheat the oven to 175ºC
- Place the chocolate and butter in a bowl over a pan of hot (not boiling) water and allow to gradually melt, stirring occasionally
- In a large bowl sift together the cocoa, baking powder and flour then stir in the sugar
- In a small bowl whisk the 3 eggs with a fork until combined
- When the chocolate and butter is melted, remove from the heat and pour into the dry mix and beat until smooth with a wooden spoon
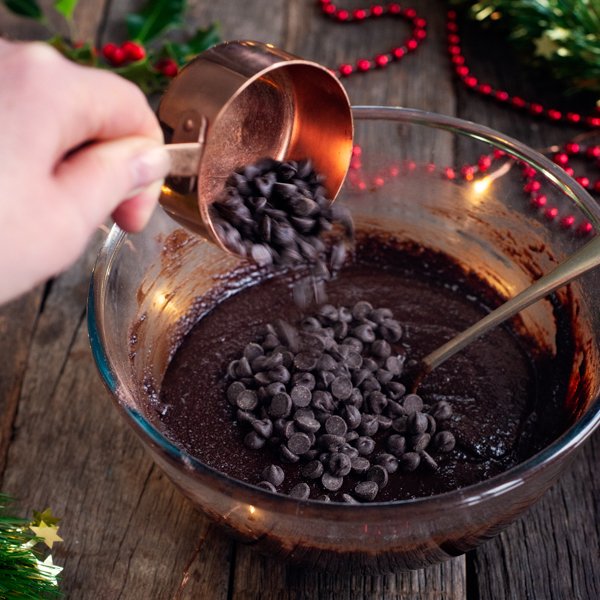
- Beat in the eggs and stir in the chocolate chips
- Pour into your prepared cake tin and bake for 30-35 minutes, or until there is ‘almost’ no wobble in the middle when you give it a gentle jiggle
- Leave to cool in the tin
- For the neatest edges remove from the tin and freeze for 20 minutes before you cut into 8 equal slices
- Mix your icing sugar with a little water and food colouring and pipe tinselly patterns onto your trees and stud with silver balls and stars